For many of you who just purchased seeds from me over the last few weeks, you may be wondering about how to go about starting your seeds.
To start your own seeds, you will need to ensure you have three things:
LIGHT. SOIL. WATER
LIGHT
If you are wanting to grow some of the lovely heirloom tomatoes and peppers, it is almost time to get them started. The proper starting time depends on the amount of light that you have. If you are using a greenhouse, or an indoor light set-up, then you can start the seed in mid-March. If you are using a bright window in your house, I would wait until mid-April. Try to find a place with the most light possible.
SOIL
You want to use what is called a 'soilless medium' to start with. This soil contains minerals and is lighter to allow your seedlings space and the freedom to grow. You can usually find this at your local gardening or hardware store. You can also make up your own mixes. (I will post some suggestions soon). When you first start your seeds, they do not need a lot of extra nutrients. Later, when the plants are established, you can use compost tea, or some richer soil to make them healthier.
WATER
It is important that your new little plants remain moist, but not too wet. Be careful not to drown your new seedlings. They can get moldy if there is too much water. If it is a really sunny day, they can also dry out quickly. You will have to pay close attention to them at this stage.
CONTAINERS
You plant your seeds in cell packs (plastic planting containers found at gardening or hardware stores). Some people use egg cartons, or other things they have around the house. Make sure that the containers have drainage at the bottom, so that the plants have air to breathe, and do not rot in water.
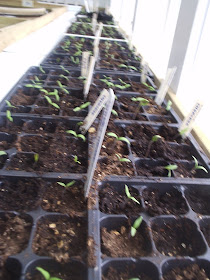
**I am starting my seeds next week, I will post pictures of them as they grow up. Below is a picture of my seeds from last year when they were just a week old . . . .


